brief
‘You must design, build and demonstrate at least one machine that effectively integrates machine elements, sensors and actuators and code to perform a specified function. Your machine must work, but it does not need to fulfill a real-world need. It can be playful, joyful, whimsical, devious, absurd.
March 2019
SKILLS
mechatronics
interaction
coding
This was a solo project across two terms. All the design, prototyping and manufacture was done entirely by me.

the idea
I built my gizmo around the simplest interaction that I could think of - turning a light on. Rather than simply flicking a switch, I wanted users to have to fully engage with the lamp. To fulfill this, I created the Rubix Lamp - a self-solving triangular Rubix puzzle. The puzzle would need to be solved in order to turn the light on, and then scrambled to turn it off. However, the Lamp also has a mind of its own - starting up when people come close to entice them in.
the interaction
The puzzle I designed was in essence simple to solve, an abstraction on a triangular Rubix puzzle. Each corner of the triangular based pyramid has two sections which can rotate, and need to have their coloured faces aligned to turn on the light.
the design
the puzzle has six sections that can be rotated independently using servo and stepper motors
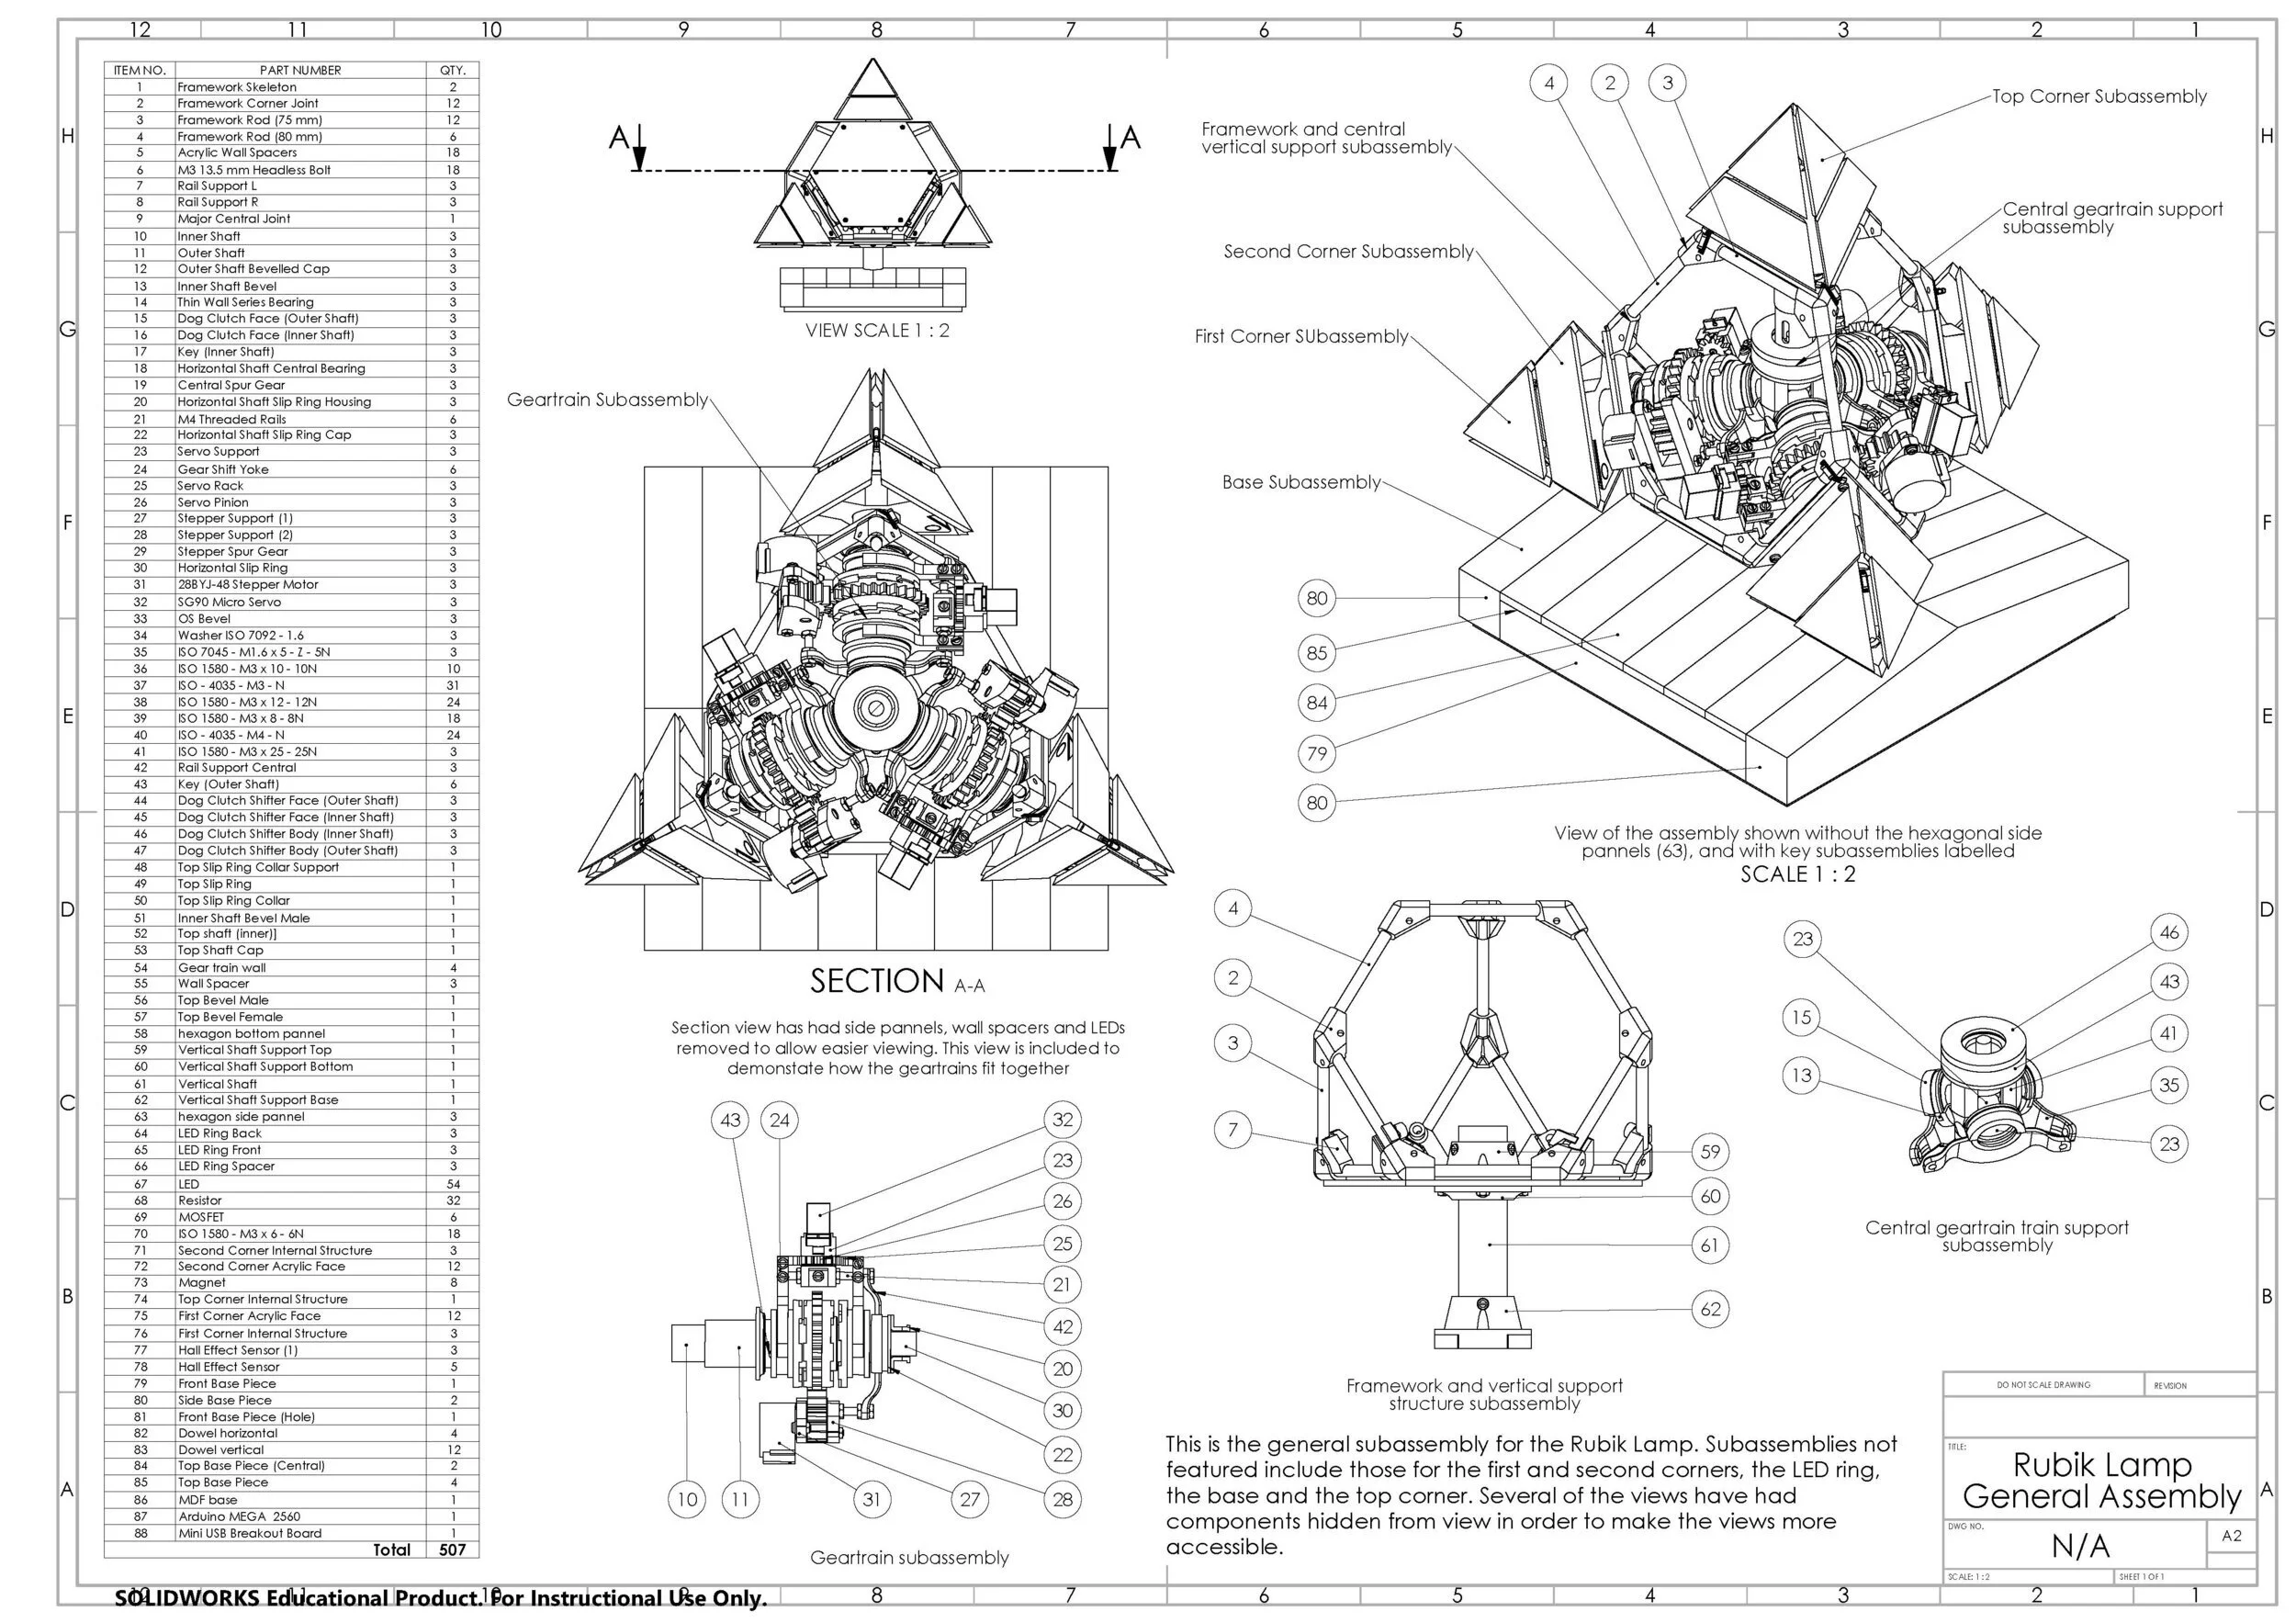
Each corner has two sections that sit on concentric contra-rotating, turned, aluminium shafts. Dog clutches powered by a servo switch the power from the stepper to the inner or outer shaft
the entire structure is supported off a steel and 3D printed frame mounted off a single column.
The tolerances of the frame had to be very small in order to make sure all the shafts aligned correctly and could turn freely. The column was then supported in a hardwood base I designed to house the electronics.
I designed a clutch system that allowed a servo motor to switch where the power of the stepper motor was sent to.
This allowed the outer and inner corners to be rotated separately, and also have a neutral position so the user could spin the corners freely.
initially I started to prototype using card models and CAD software, moving onto desktop prototypes once I had designed the mechanisms
Due to the number of internal components, prototyping the design using CAD assemblies was essential to make sure everything fit. This gizmo was made from: turned aluminium, finished hardwood, laser-cut acrylic, 3D printed PLA and over one hundred electronics components
the LEDs shine though opalescent acrylic sheets, diffusing the light and shielding all but a few glimpses of the electronics from view
Each corner containing LEDs rotates relative to the main bod, meaning that the connection to the microcontroller has to pass through a slip ring first. I designed the corners to be self contained modular parts that could be attached with only a few wired connections during assembly.


